
Fabric Face Mask
Fabric Face Mask
With a few sewing materials and a face mask pattern, you can create your own fabric face mask. Find easy step-by-step instructions below for how to make your own face mask using fabric.
Shop tools & materials you’ll need:


Tools & materials you’ll need:
- Tightly-woven cotton fabric
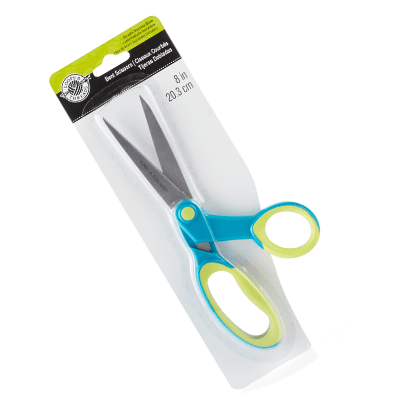
- Scissors
- Sewing machine & thread
- Straight pins
- Chenille pipe cleaner
- Optional: elastic
Also, make sure you’ve got an iron, hot glue gun & glue sticks, computer and printer.
Here’s how to make it:
NOTE: This mask is made with fabric ties. To use elastic instead, cut two 17.7 cm pieces and skip down to Step 4.
Step 1
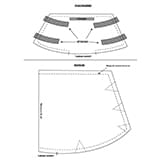
Print out this pattern and this diagram. Cut out the pattern and set it aside.
Step 2
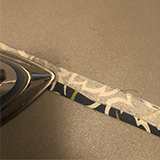
Cut four 3.1 cm x 53.3 cm strips of fabric. Fold each strip in half and press with your iron.

Step 3
Lay one strip pattern side down on your workspace. Fold the raw edge in toward the center fold mark and pin in place. Repeat for the other edge, then fold together, pin and sew. Repeat for the remaining 3 strips.
Step 4
Fold your mask fabric and position the pattern on the fold where indicated. Pin in place and cut out two pieces.
Step 5
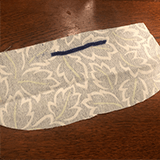
Cut a 7.6 – 10.1 cm piece of chenille pipe cleaner and position it on the non-pattern side of one face mask piece. Zig-zag stitch, hand stitch or hot glue it into place. (This will allow the user to fit the mask onto their face around the nose and top of cheekbone.)

Step 6
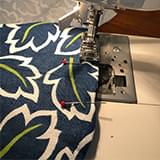
Lay the mask piece with the chenille stem from Step 5 pattern side up, and pin your straps into place according to the diagram. Sew the straps into place.

Step 7
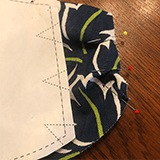
Turn your mask piece pattern side up and gather the straps in to the center of the mask. Tie or pin the straps together to avoid stitching over them. Lay the other mask piece pattern side down on top and pin these two pieces together. Stitch around the mask with a .6 cm seam allowance, leaving an opening at the bottom as shown on the diagram.
Step 8
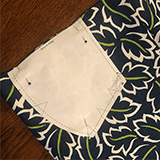
Turn the fabric inside out through the opening on the bottom of the mask. Flatten out the mask. Pin the opening together and stitch it closed.
Step 9
Following the diagram, create and pin the tucks, then sew them to secure.
Step 10
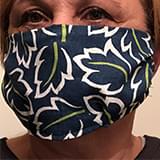
Tie the straps around your neck and over the top of your head to wear the fabric face mask.
Templates referenced above follow similar medical materials that are recommended for these items. Medical professionals receiving these items will decide how best to use them.